If you have not yet downloaded our app, you can get it here for iOS or here for Android. We are going to take you through a tutorial of adding clothes and making an outfit on the Hems App for your next adventure (with pictures to follow along). For today’s tutorial we are adding an Eras Tour shirt and making a casual outfit on a team member’s account, utilizing the version of the app that is currently available on both app stores.
Adding a Shirt
Upon logging in and setting up an account you will be taken to the “Closet” tab at the bottom of the screen. Our account here already has clothes and even our team member’s dog uploaded, unfortunately the dog is not included for all Stylists. Our lingo for all app users is Stylists, everyone can show off their style here.
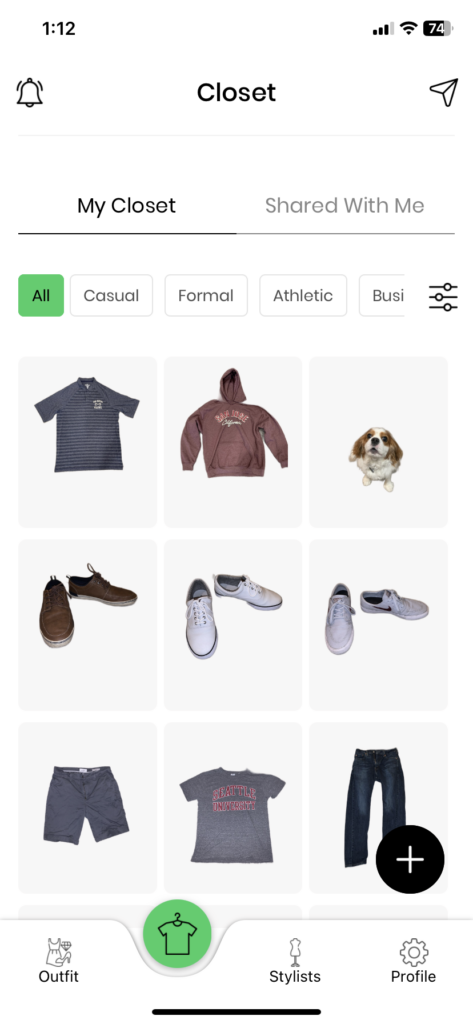
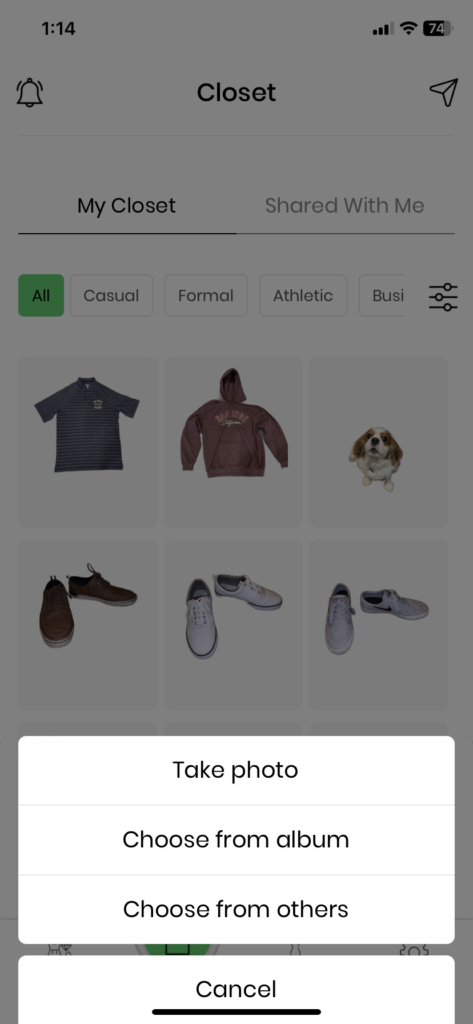
To begin hit the “plus sign”+” button and you can either choose to take a photo now, choose from your camera roll, or “Choose from others” which will allow you to borrow clothes from other Stylists you are connected to and put their clothes in your closet. Today we will take a photo with the Hems App so we can demonstrate the basics and can get into the fancy features in another post.
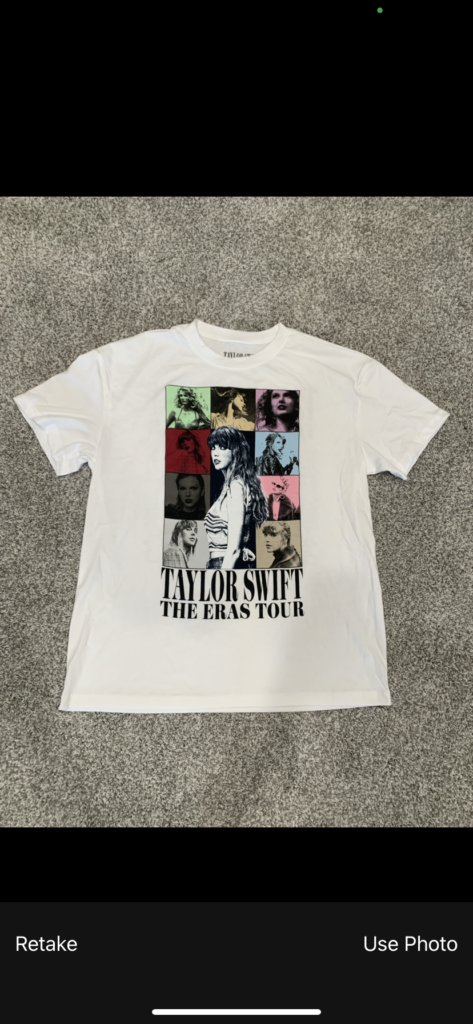
When you are taking photos of anything to add to your closet, we recommend taking the picture against a singular color background such as a floor or a wall to provide the best results. We will be using a white shirt that is laying on carpet. Once your photo is taken, continue with the “Use Photo” button on the bottom.
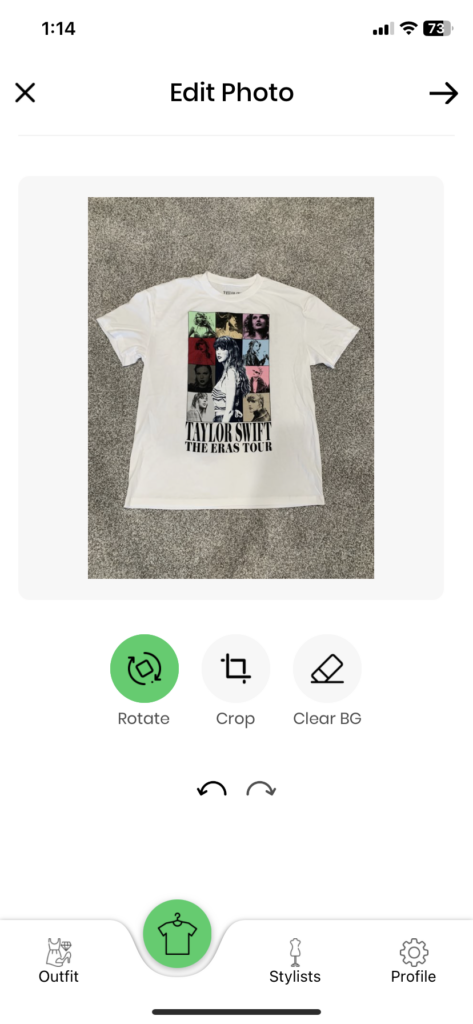
Once you take a picture of you desired shirt, pants, shoes, bag, article of clothing, or even dog, you will be taken to a page to edit the photo you took. This is where you will be removing the background from the image to isolate the clothing so that it can be neatly used to make an outfit later. Clicking the “Clear BG” button under the image will take us from the first image below to the second image.
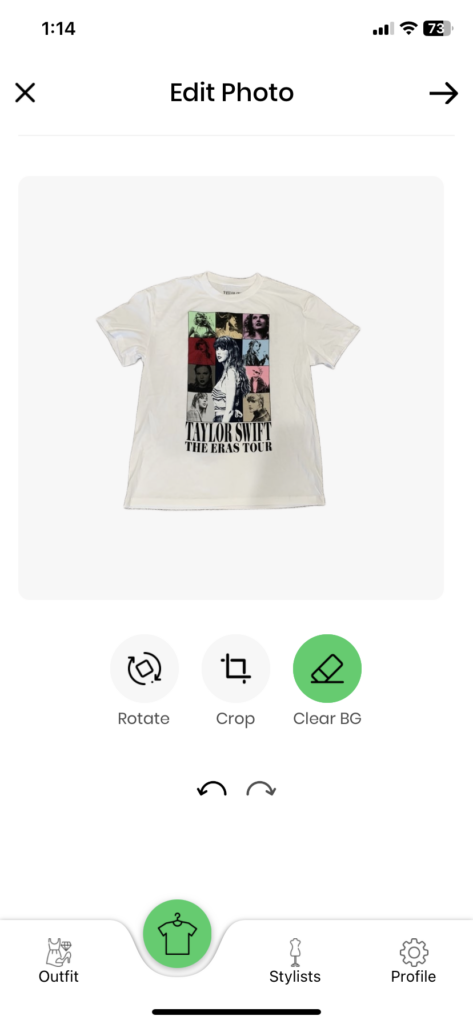
Once ready you are ready to move forward, clicking the straight arrow at the top right, you will be given the ability to describe the color and category or occasion you would like to for your newly added clothes. You will be able to filter your clothes by this information while it is in your closet. You can always change these characteristics later if you feel like your shoes are a different shade of blue than originally used or even set your clothes as multiple colors and/or categories.
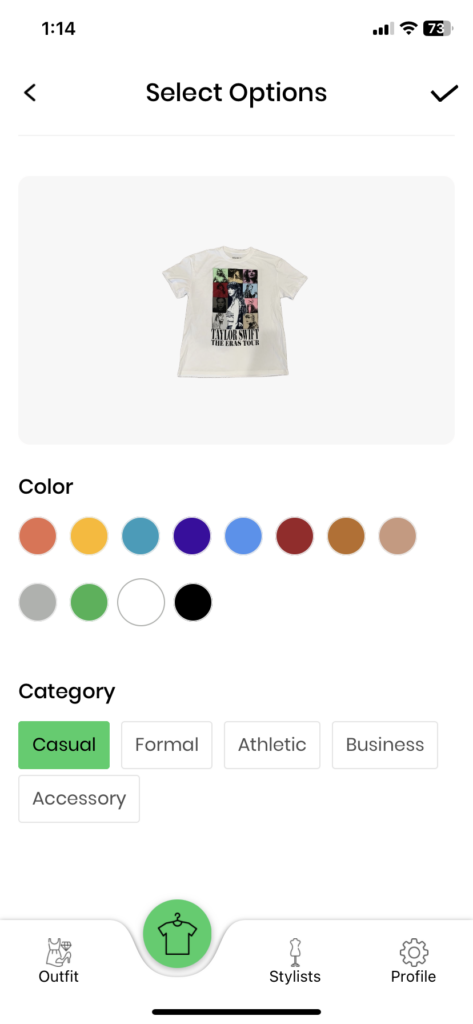
Once you click the check mark in the top right-hand corner, you are done! You just added clothes to your Hems App closet! Repeat to add more clothes and accessories and fill up your closet. Now let’s make an outfit for the next time you go out on your Sunday errand run.
Making an Outfit
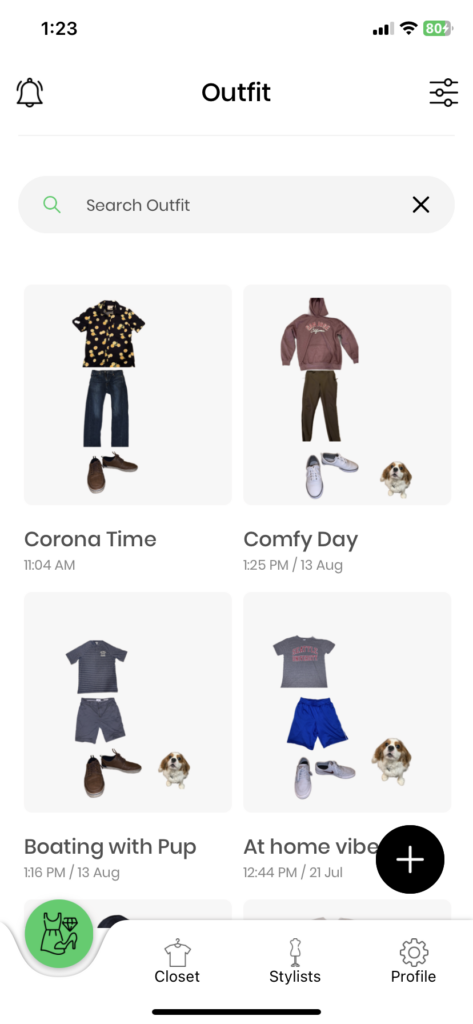
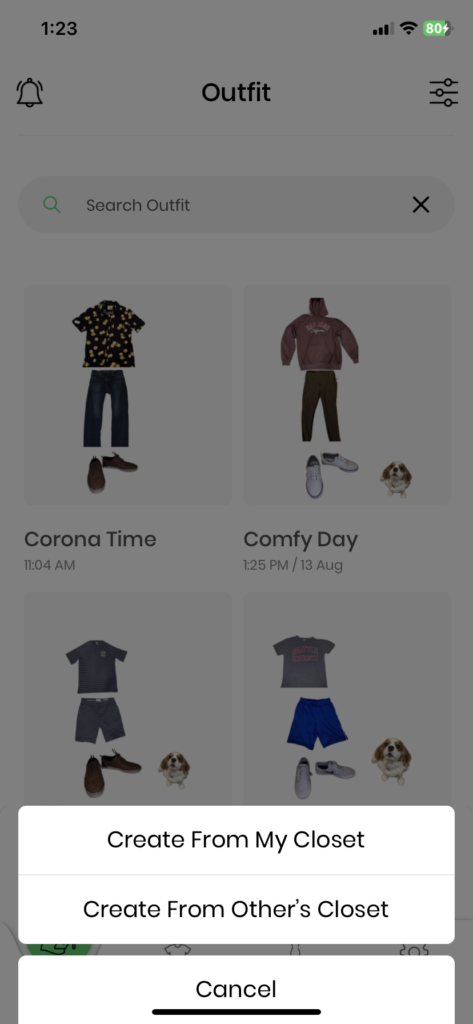
After you have added enough clothes to your closet, we are ready to make an outfit for Sunday morning. Let us start by clicking the “Outfit” tab at the bottom left. Once there, you can see your all the outfits made by you or the other Stylists you have granted permission to make outfits for you. Right now we are going to make an outfit out of the clothes in our own closet starting with the “+” button at the bottom right then select “Create From My Closet”
You will now be prompted with all of your clothes saved on the app can mark off which ones you would like to include when creating your outfit. You can add and delete more clothes later, but for now let us keep it simple with a top, bottom, and a pair of shoes. Once selected, a small box in the top hand corner of each item will be filled in with a green box. When ready to proceed, hit the check mark in the top right-hand corner of your screen.
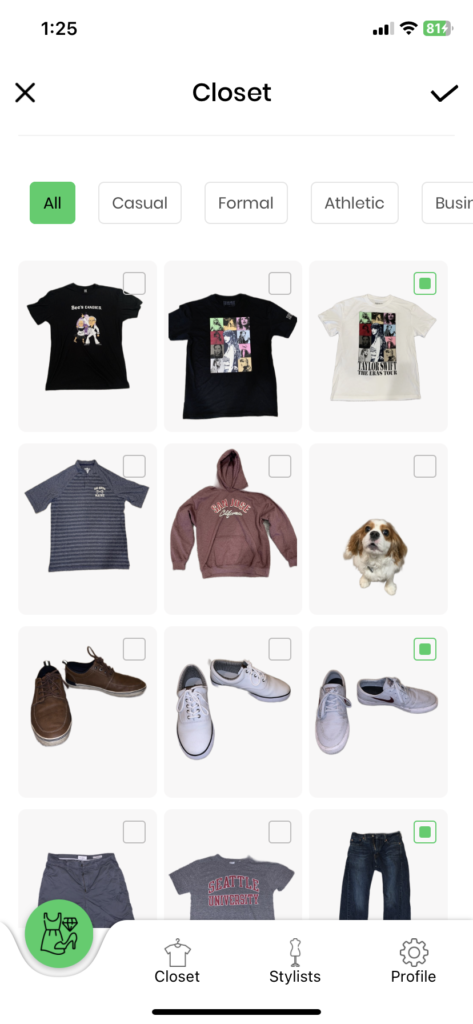
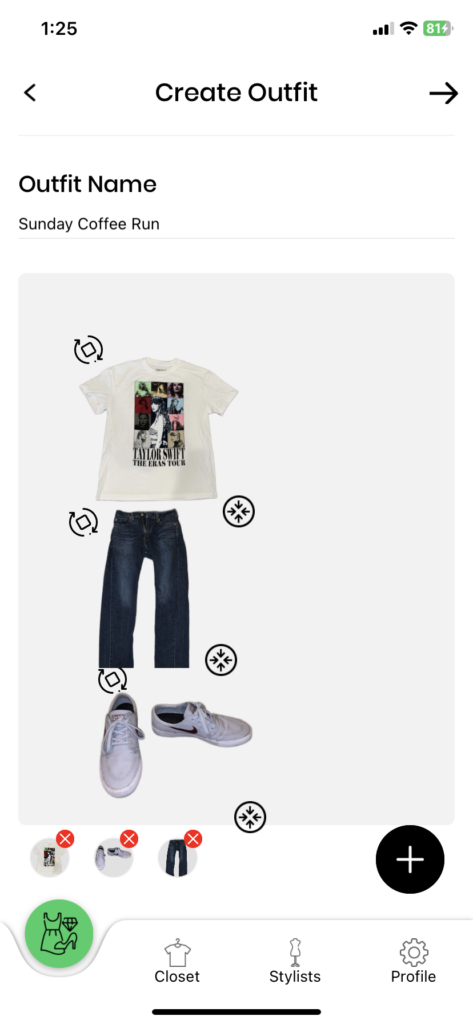
Once it is confirmed, you can rearrange the clothes however you would like. You can increase the size or rotate clothes as needed. Once the clothes are aligned how you would like them and you name your outfit, you are ready to move on to describing it so you can find it again in the app, similar to what we did for the shirt above.
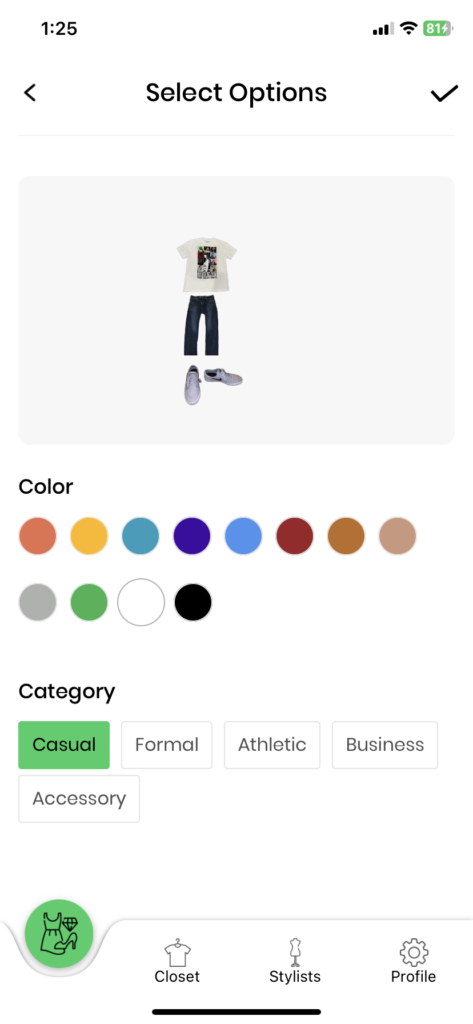
Once you are done, hitting the check mark will save the outfit you just made to your Hems App. Congratulations! Stay tuned for more tutorials on how to use the Hems App by checking back into Hems & Threads (our blog) every week!
